Oleria provides adaptive and autonomous access security that sets your business free. As part of that promise, we provide deep integration of your Salesforce application into the Oleria platform. This document provides step-by-step guidance to integrate your Salesforce application instance with the Oleria workspace.
Oleria supports Sales Cloud and Service Cloud

Pre-requisites:
- Salesforce Admin role
Please use a service account (and not an employee account) with the suggested privileges for the integration to ensure continuity
Steps to Integrate Salesforce with Oleria Workspace
Step 1: Create the Oleria app in your Salesforce instance
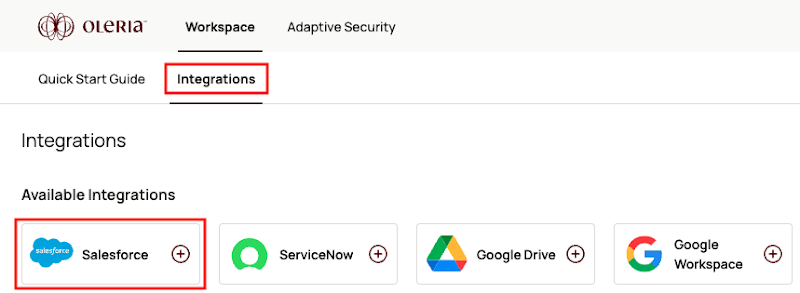
1..1 Login to your Oleria workspace, select Integrations → select Salesforce
1.2. Opens a side page with pre-requisites and a link to the onboarding instructions. Click Continue

1.3. Provide your Salesforce URL and click Authenticate.
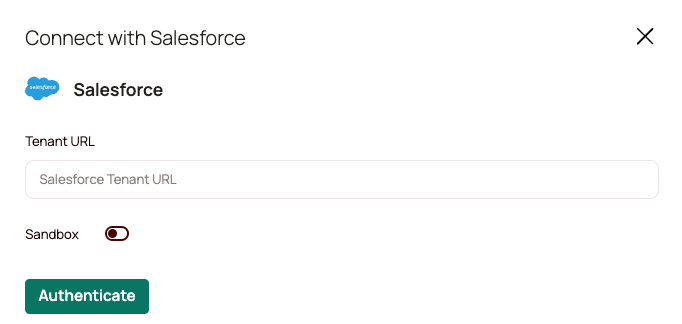
Note: Turn the Sandbox switch to integrate if you are integrating a salesforce sandbox environment
1.4. Authorize Oleria access to create a connected app called “Oleria” in your Salesforce application.

Note: You will see an error creating integration notification “User hasn’t approved this consumer”. Ignore this message and complete Steps 2 and 3 to install the Oleria app and Oleria Access permission set in your Salesforce application.

Step 2: Install Oleria app in your Salesforce application
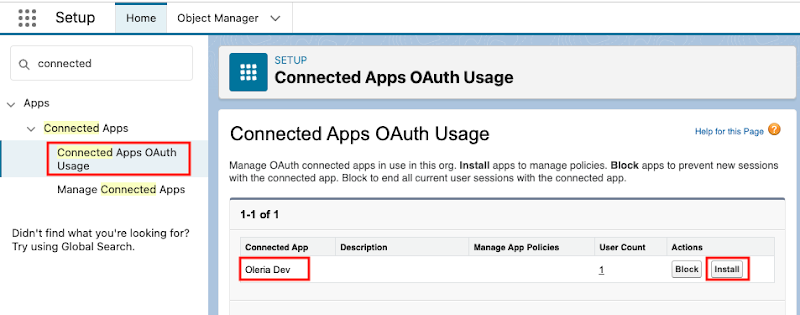
2.1. Login to your Salesforce application, search “Connected Apps OAuth Usage”, select “Oleria” app and click Install
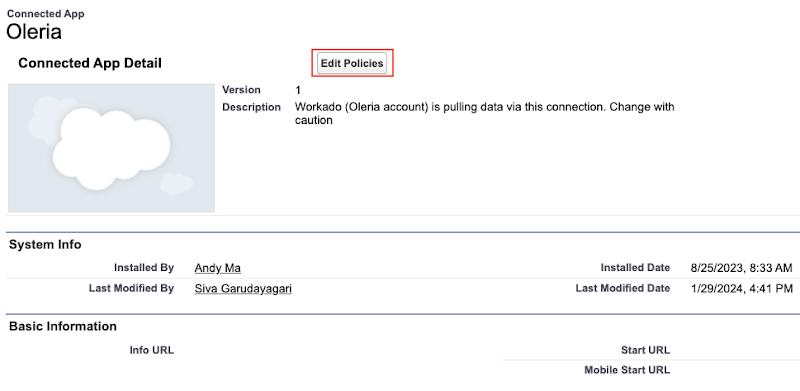
2.2. After completing the Oleria app installation, select “Edit Policies”
2.3. Navigate to the OAuth Policies section, set Permitted Users to “Admin approved users are pre-authorized” and click the Save button.

Step 3: Create a Permission Set for Oleria Access
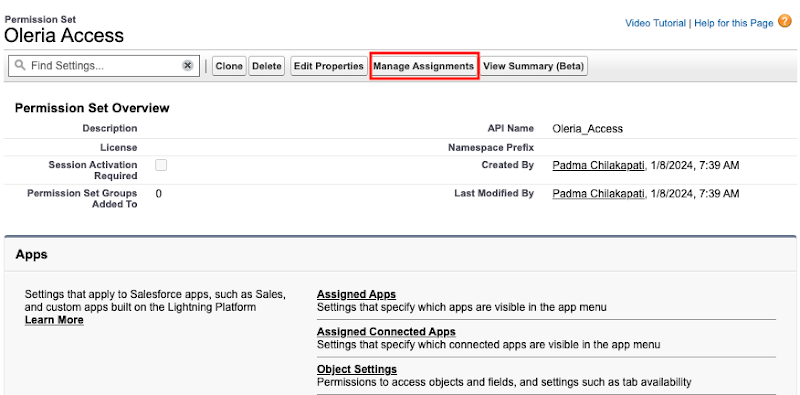
3.1. Navigate to Permission Sets and select New to create a new permission set “Oleria Access”

3.2. Give Label as “Oleria Access” and API Name as shown below, save the permission set.

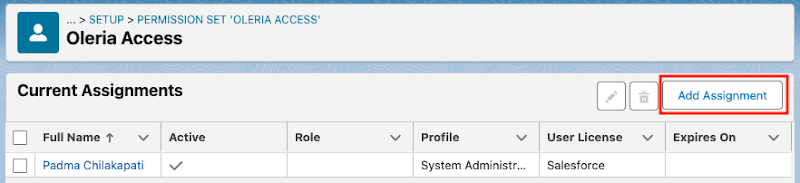
3.3. Open Oleria Access Permission set, select Manage Assignments to assign a user
Select Add Assignment and assign a user
3.4. Open Oleria Access Permission set, select “Assigned Connected Apps” to add “Oleria” app to the Oleria Access permission set
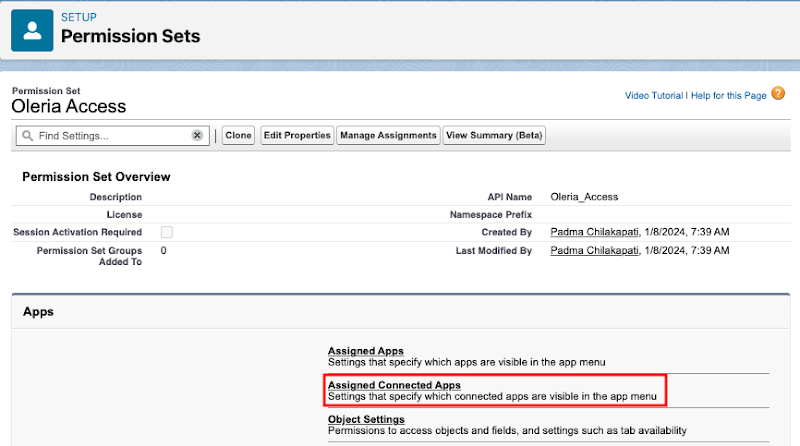
Select Edit in the Assigned Connected Apps section, select Oleria and click save.

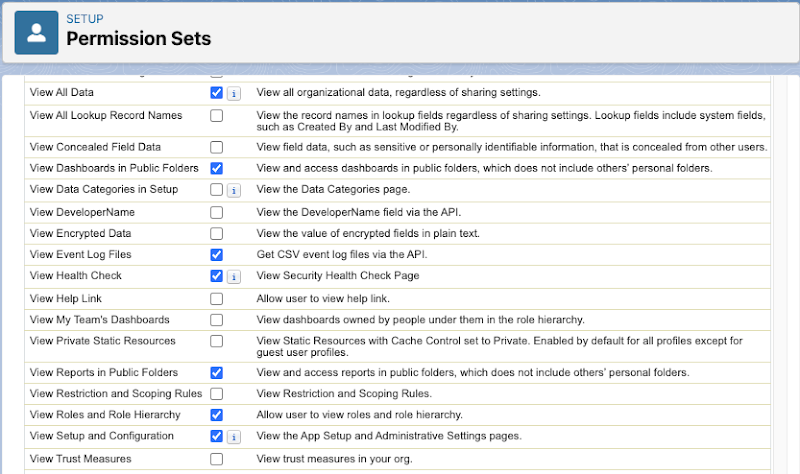
3.5. Select System Permissions

Click Edit and select “View All Data”, “View Health Check” and “Manage Multi-Factor Authentication in API” as shown below

To perform remediations, you need to select the following permissions in the permission sets
- To ‘disable account’, enable Manage Users under permission sets

- To ‘remove user from group’, enabled Modify All Data under permission sets

Search order and select Orders

Click Edit and select Order Name as shown below
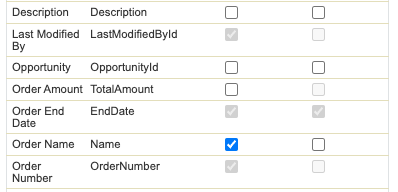
Note: Skip this if the Orders object does not exist
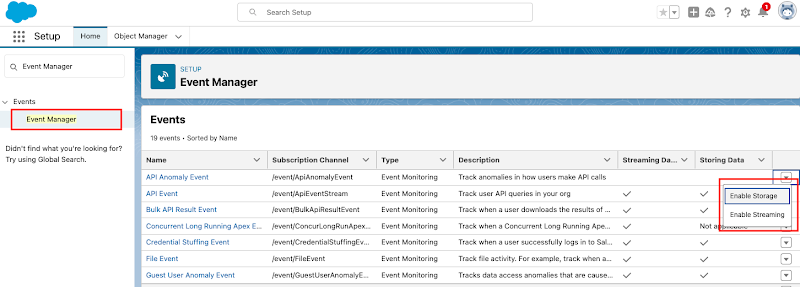
Step 4: Configure events in the Event Monitoring
Oleria recommends enabling and configuring Event Monitoring (Shield) in your Salesforce instance. This helps capture all users' activities and provide insights into them. Without event monitoring (Shield), the user activity insights are limited to login and logout activities.
Follow these steps to enable storage and streaming for the events from the Event Manager.
4.1. Select Set up → search Event Manager -> Enable storage and Enable streaming for all the events
Step 5: Integrate your Salesforce application into your Oleria Workspace
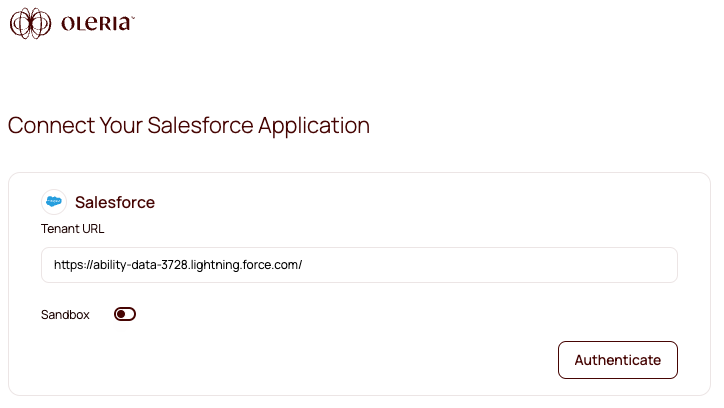
5.1. Goto your Oleria workspace, select Integrations → select Salesforce
5.2. Provide your Salesforce URL and click Authenticate.
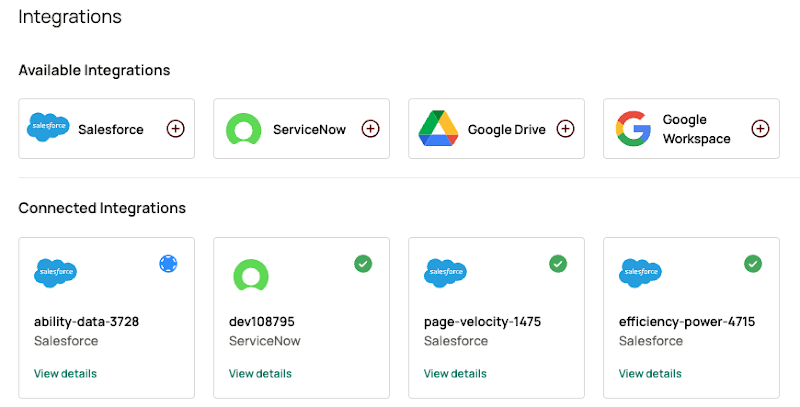
5.3. You can find a newly integrated Salesforce instance in your Oleria workspace connected integrations
Contact us
For questions about this integration, please contact us at support@oleria.com.