Oleria provides identity security and access management teams with visibility and intelligence into who has access to what, where they got that access, how they are using it, and whether they should even have it. As part of that promise, we deep integrate your PingOne into the Oleria platform. This document provides step-by-step guidance for integrating PingOne with your Oleria workspace.
Pre-requisites:
- The user granting these permissions must have Administrative privileges.
Note: Standard integrations are configured with read-only permissions.
Please use a service account (and not an employee account) with the suggested privileges for the integration to ensure continuity
Step 1: Create an Oleria application in your PingOne instance
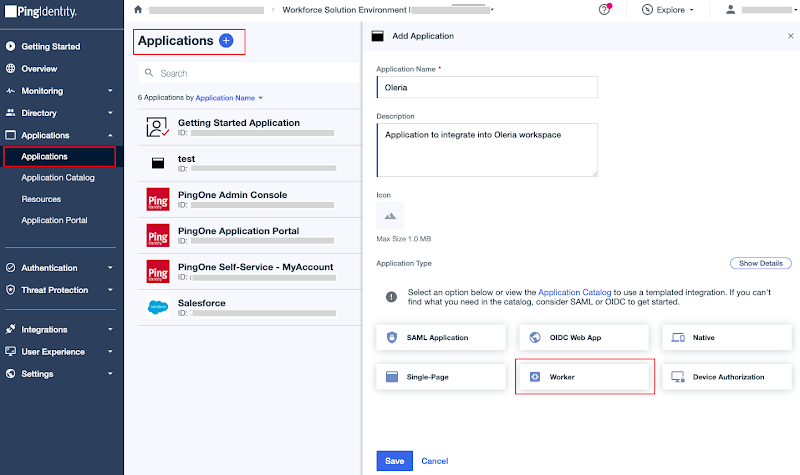
1.1. Log in to your PingOne instance, navigate to Applications, and click the “+” icon to create a new application.
Enter the application name Oleria, select application type Worker, and click save.
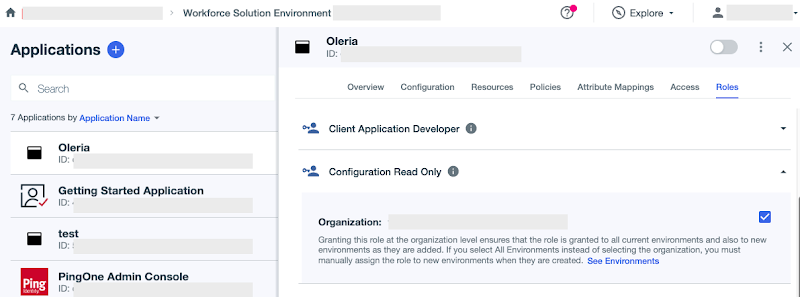
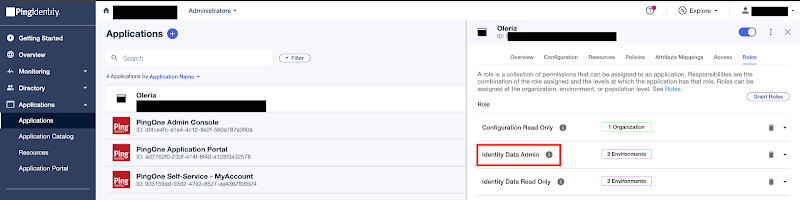
1.2. The newly created application opens and shows the Roles tab. Select Grant Roles

1.3. Select the following roles
- Configuration Read Only (select organization)
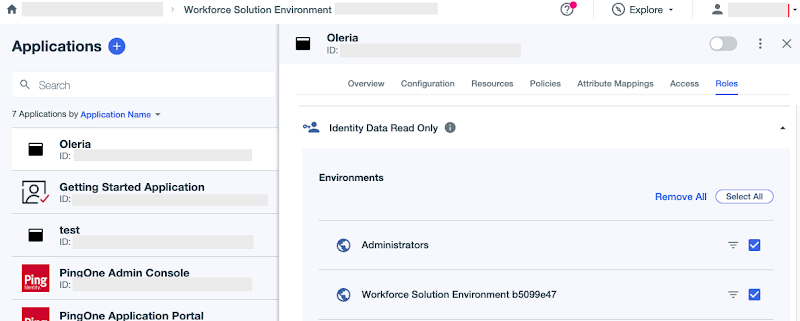
- Identity Read Only (select all environments)
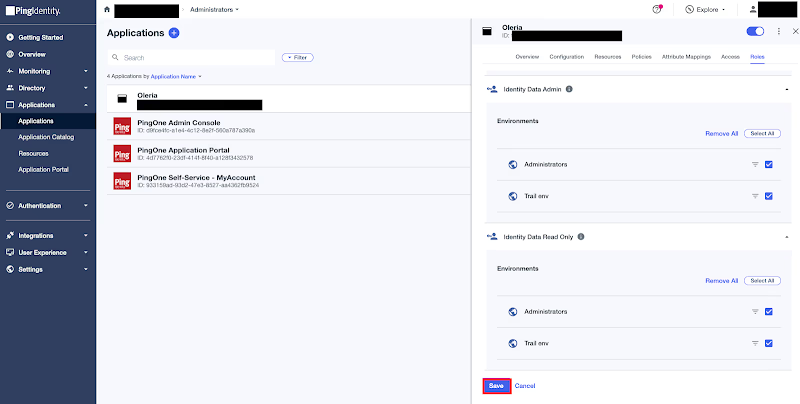
1.4. To enable remediations, you have to grant the following role
For ‘Disabling dormant accounts’ and ‘Remove user account from groups’ - choose the ‘Identity Data Admin’ role and select all environments. Click save.
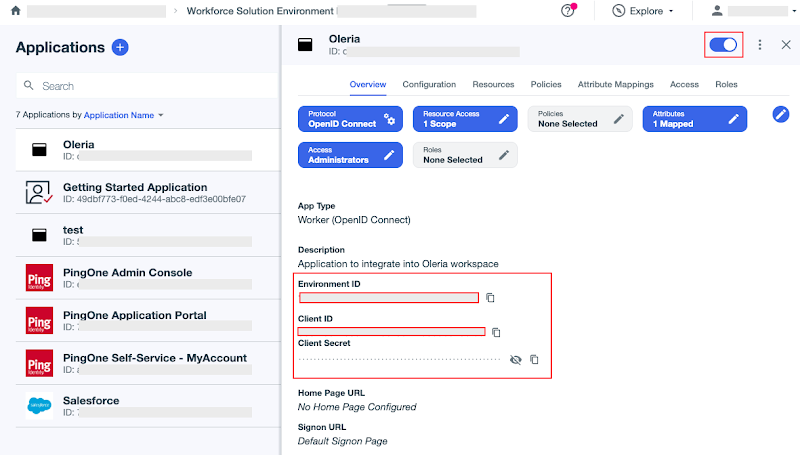
1.5. Enable the Oleria application.

1.6. From the Oleria application overview and note down the following
- Environment ID
- Client ID
- Client Secret
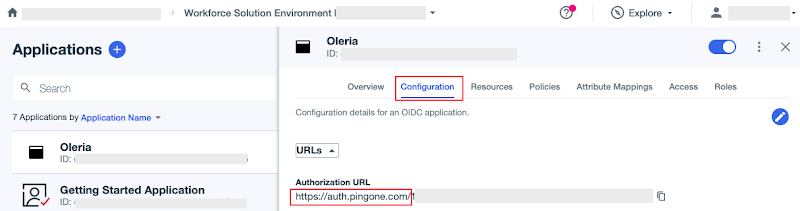
1.7. From the Oleria application configuration, expand URLs and note down the region as shown below
Step 2: Integrate PingOne with Oleria Workspace
2.1. Log in to your Oleria workspace, navigate to Integrations, and select PingOne. A side page opens and click Continue.
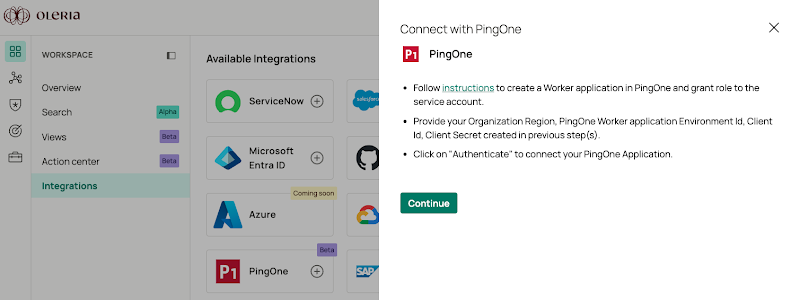
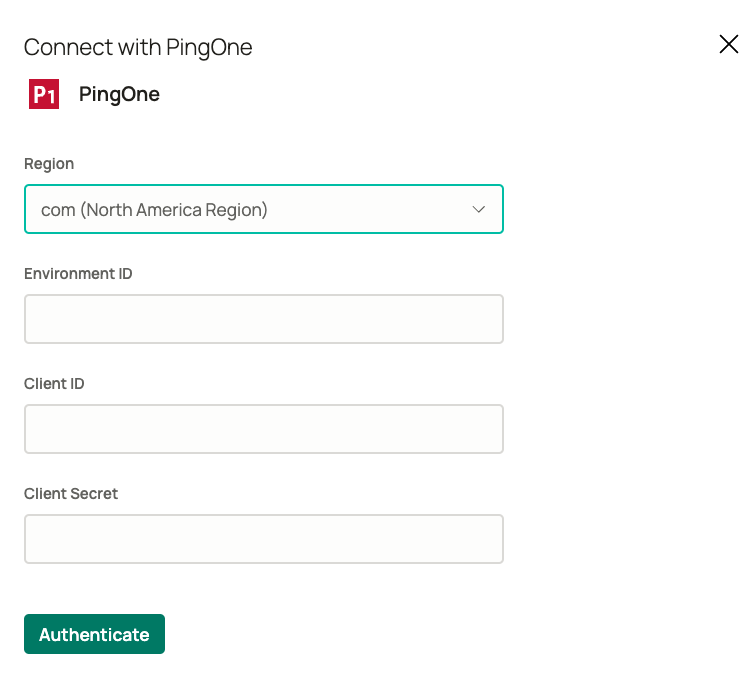
2.2. Provide the following information and click Authenticate
- Select the region for your Organization from step 1.6
- Copy the Environment ID saved from step 1.5
- Copy Client ID saved from step 1.5
- Copy the Client Secret saved from step 1.5
2.3. Find the newly integrated PingOne instance in your Oleria workspace connected integrations
