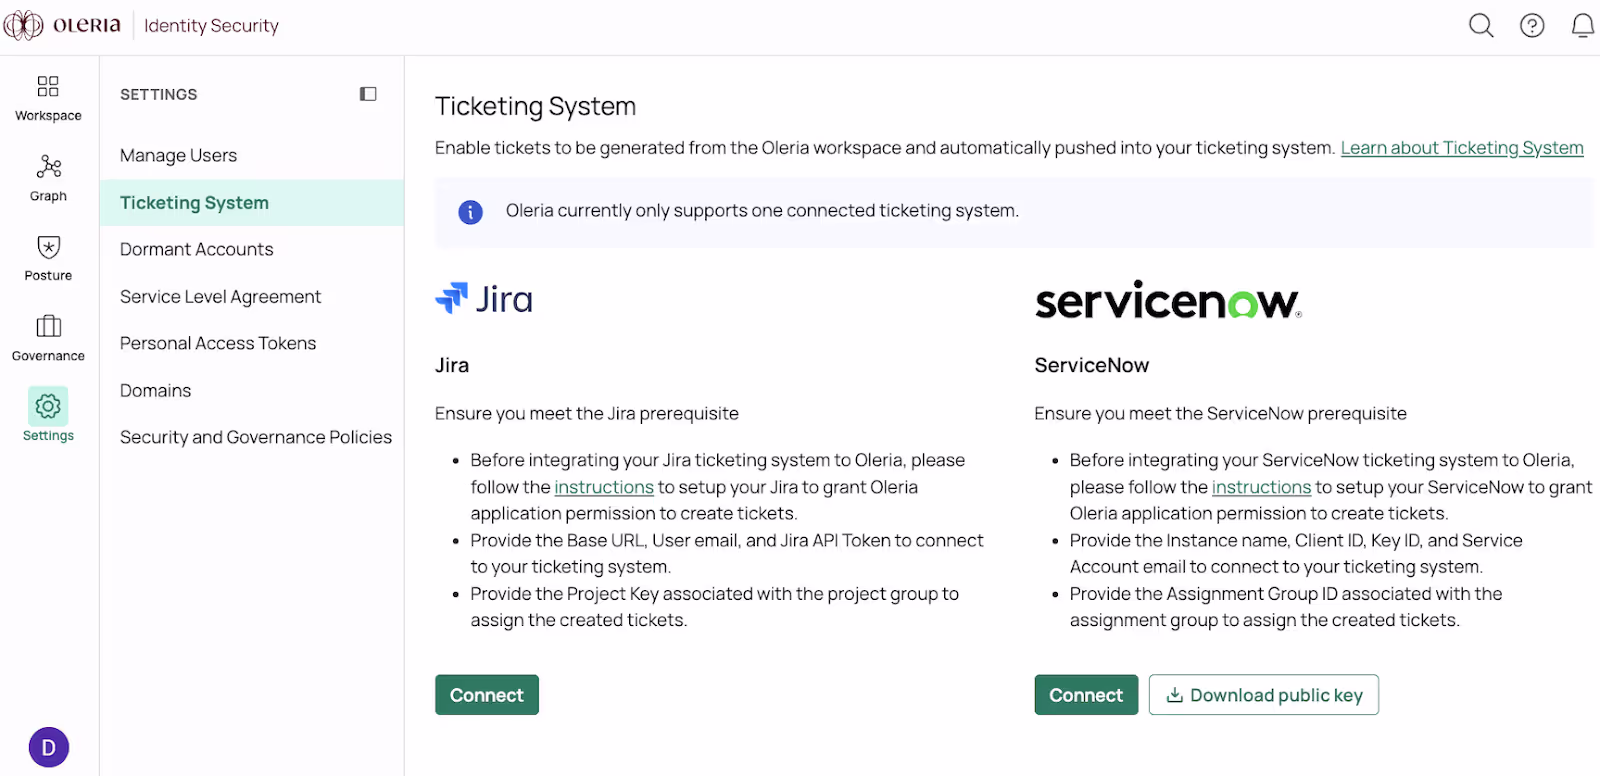
Oleria provides adaptive and autonomous access security that sets your business free. As part of that promise to better organize, Oleria supports integration with Jira and creates tickets in your Jira ticketing system,
Pre-requisites:
- A User with create permissions
- The Jira base URL
- The Jira project where tickets to be created
Steps to integrate Jira
1. Create an API token in your Jira instance
1.1. Navigate to your Jira instance, select settings, and select Atlassian account settings

1.2. Select Security and select Create and manage API tokens

1.3. Click Create API token, give a name to the, for ex, Oleria integrator, and set an expiration date.
Note: When the token expires or you decide to revoke it, you must remove the Jira ticketing integration from Oleria and re-add it with a new API token created through the previous steps.
We support token updates in the upcoming releases.

1.4. Copy the token generated.

2. Integrate Jira with your Oleria Workspace
2.1. Goto your Oleria workspace, navigate to Settings → select Ticketing System → click Jira Connect
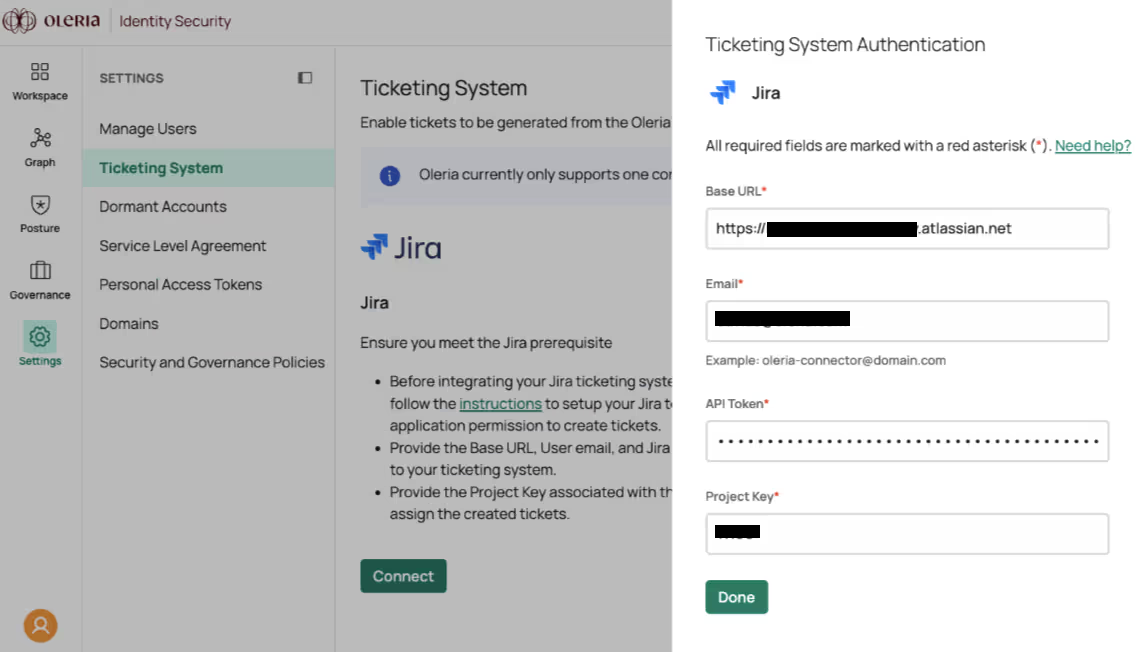
2.2. A side panel opens and provide the following details
- Base URL: Your Jira instance URL
- Email: User email who has the create permissions
- API token: API token copied from the step 1.4.
- Project key: Your Jira project name
2.3. You will see the Jira integration in your Oleria workspace. Click View details to view the Jira integration status.
